Note: Although this article is about Google Workspace, the same principle applies for any email service.
Click "Verify Domain" once the account is setup. You'll be taken to a screen that looks like this but DO NOT follow the instructions it gives you:
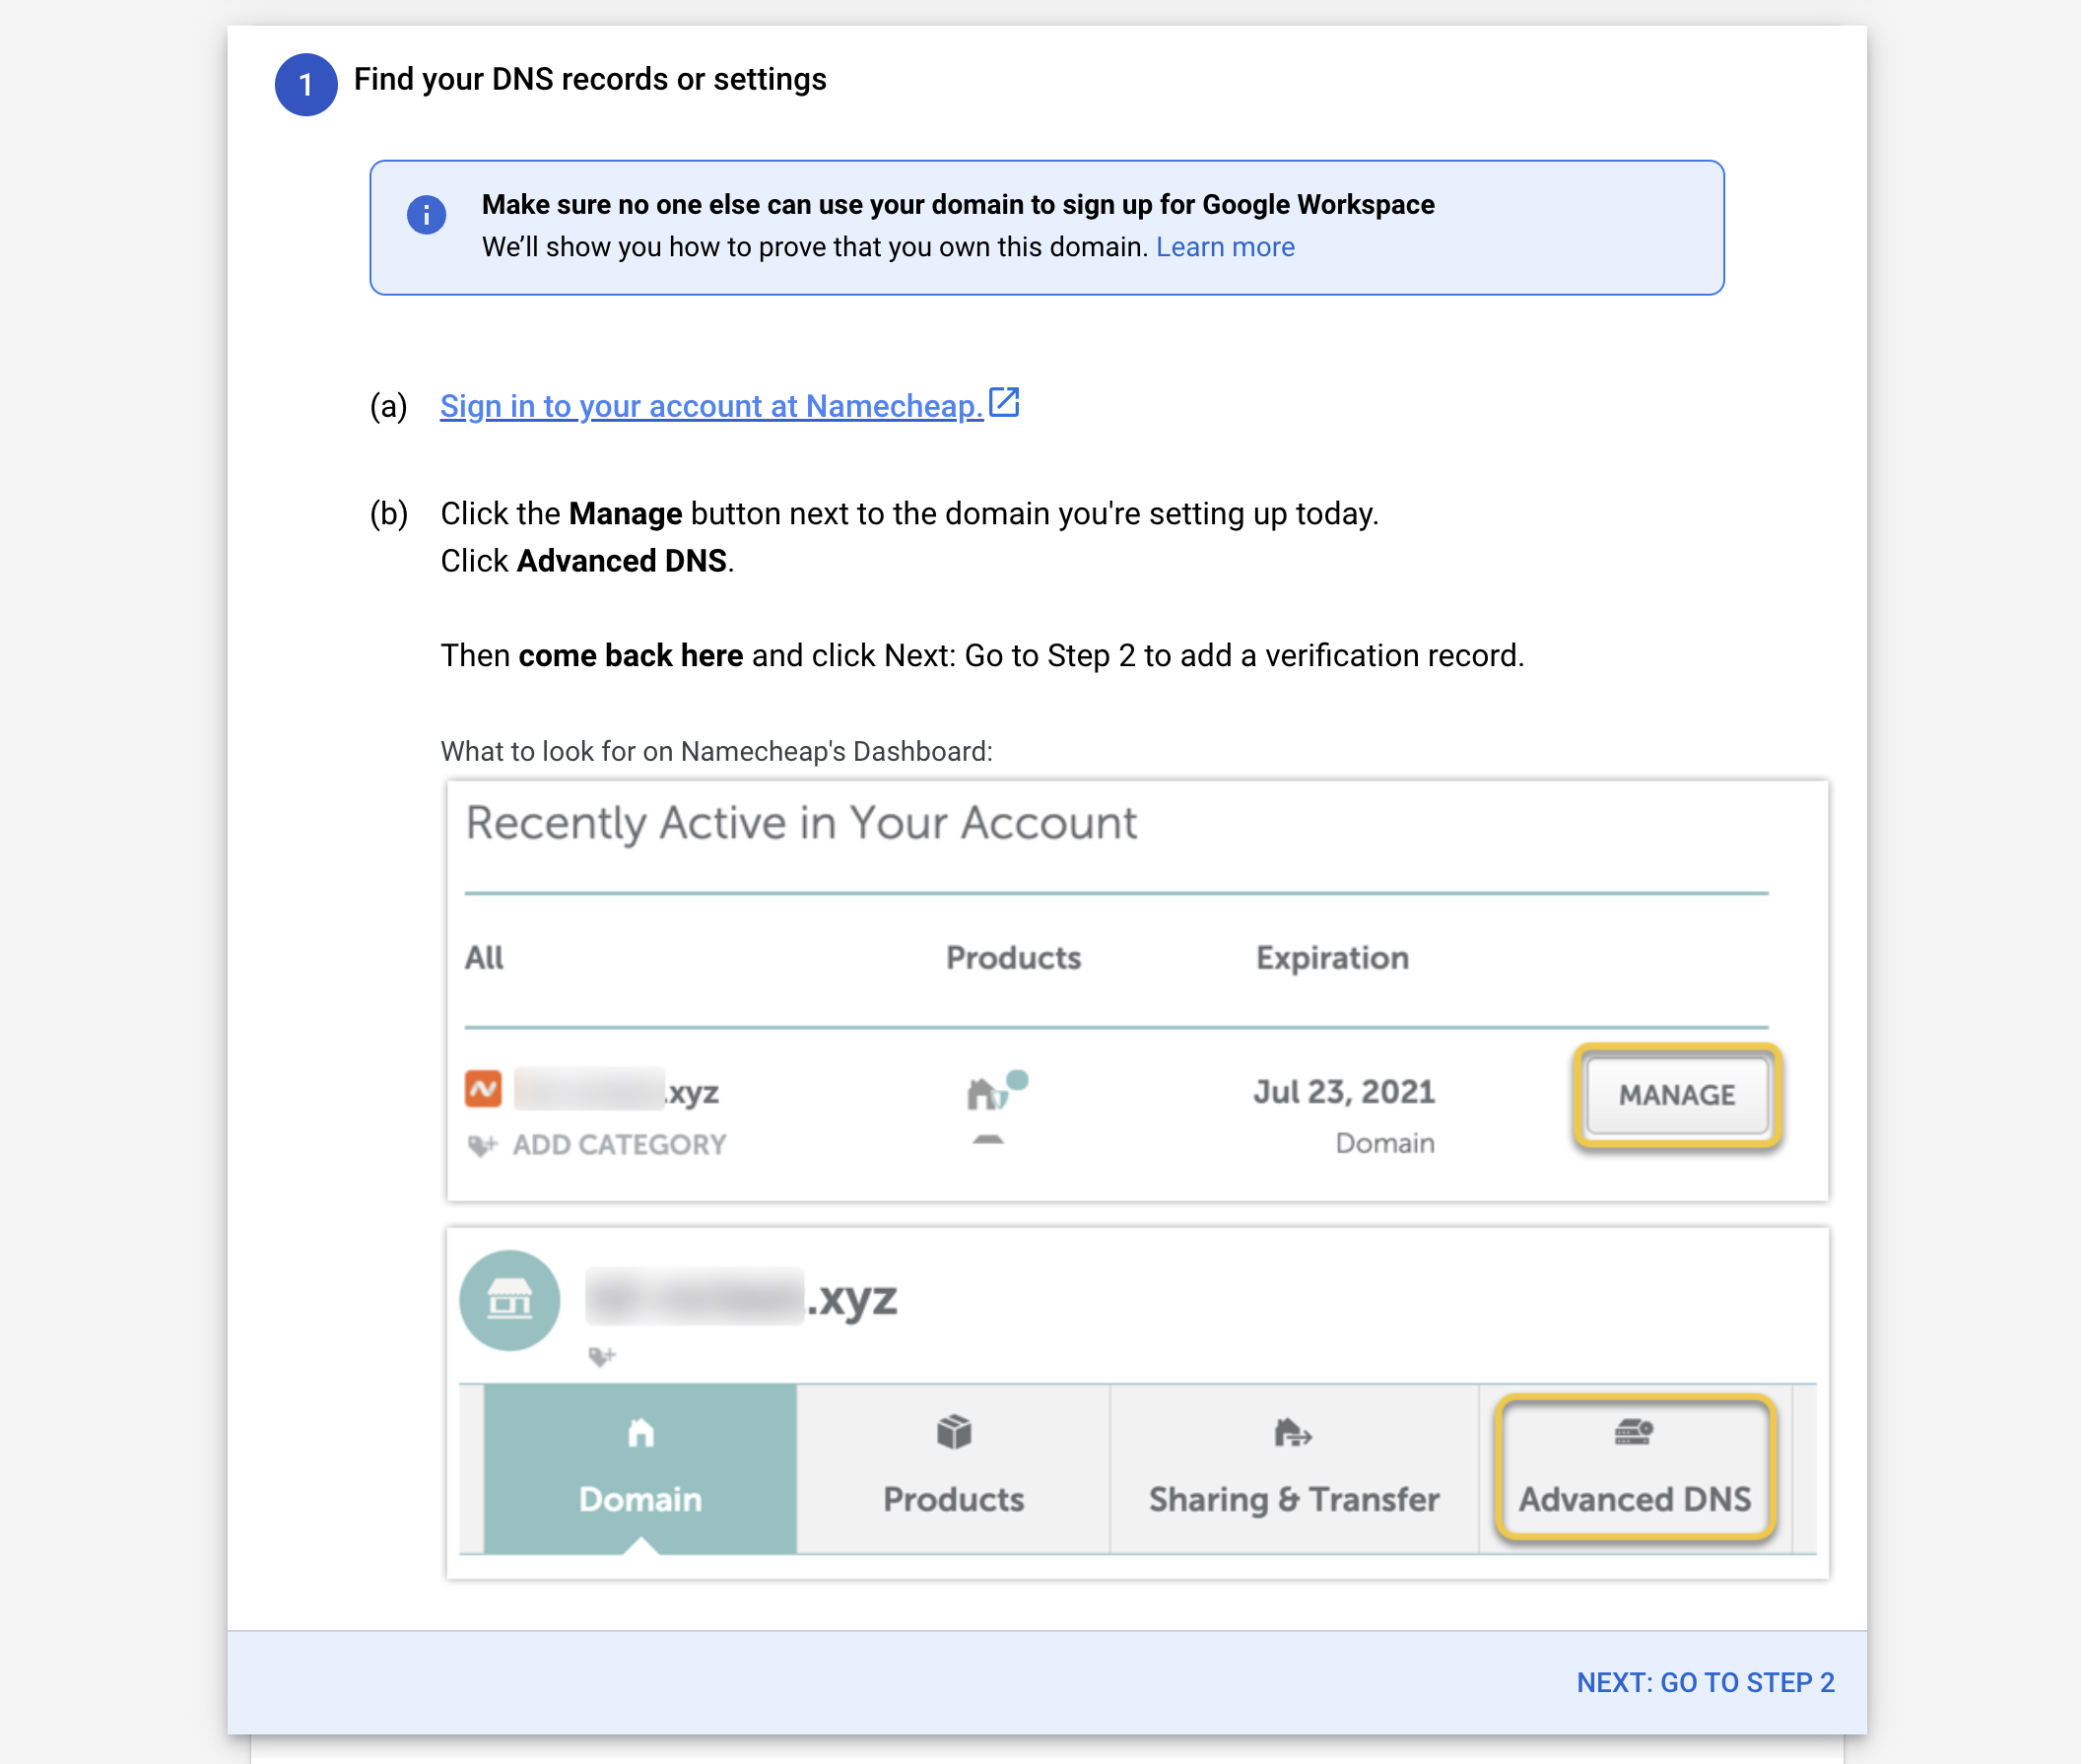
The instructions tell you to carry out actions on Namecheap. Namecheap acts as the Journo Portfolio Domain registrar which is why it says this. Ignore the instructions and click "Go to Step 2" until you find the "TXT" record (unique to your domain). It should looks like this:
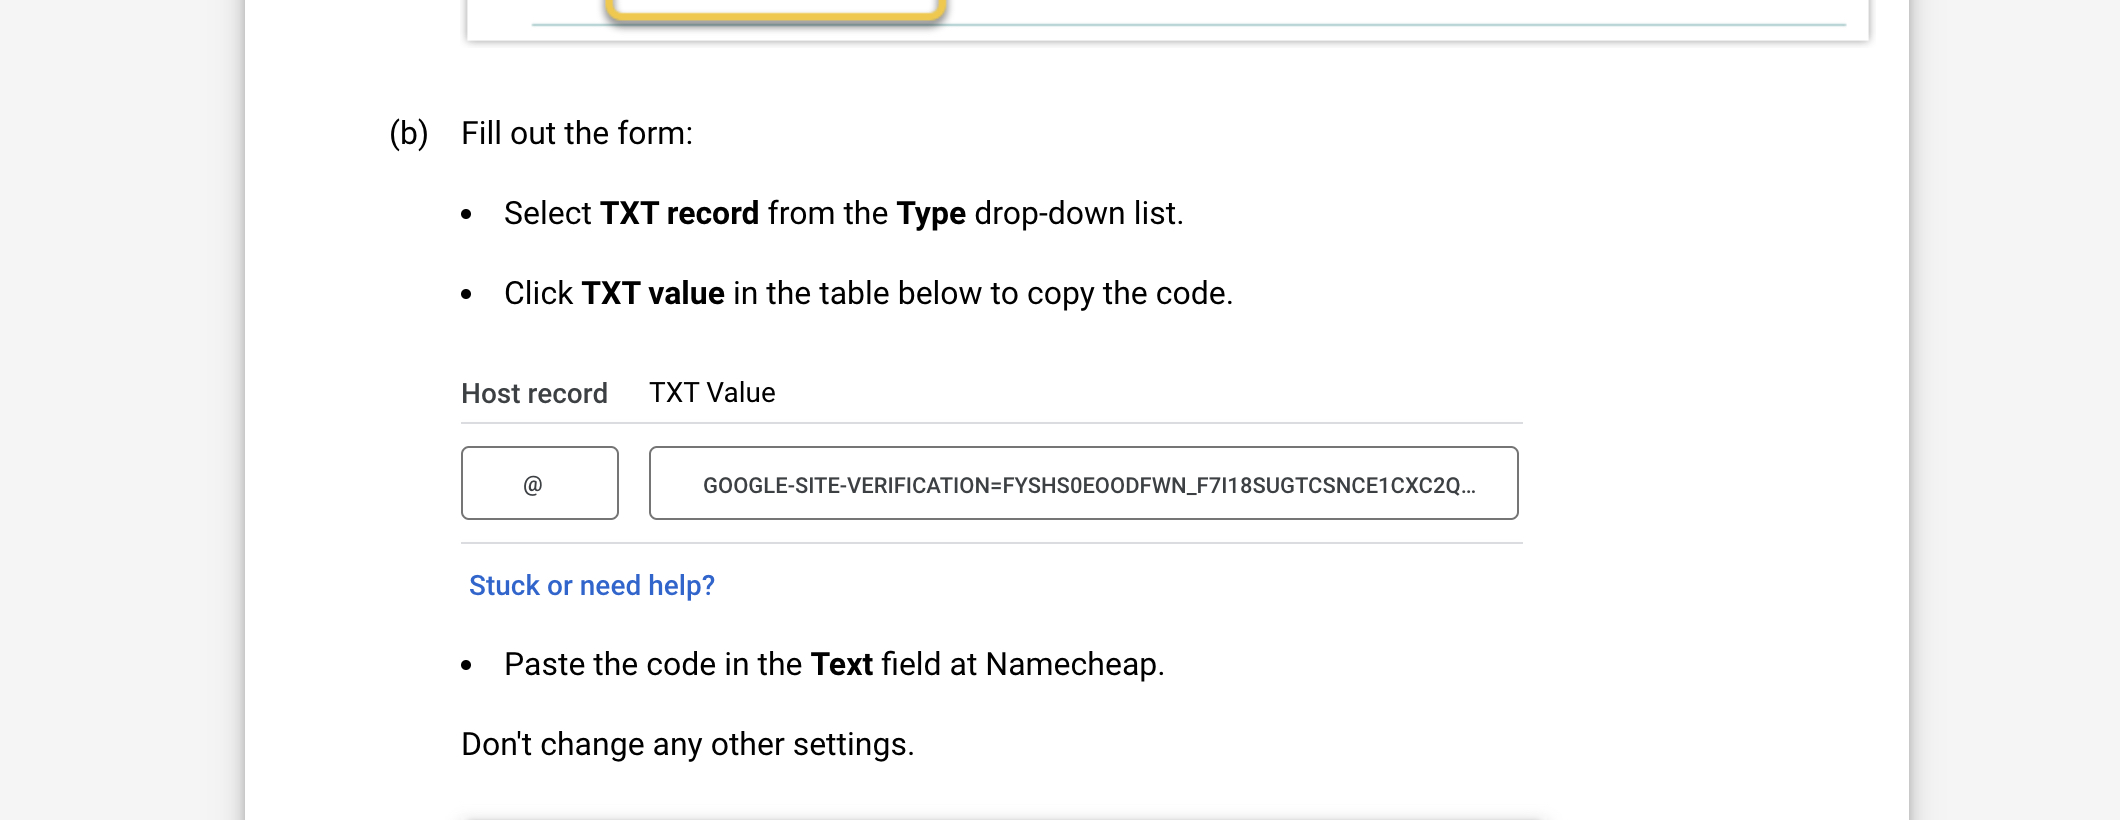
Copy the record by clicking on it.
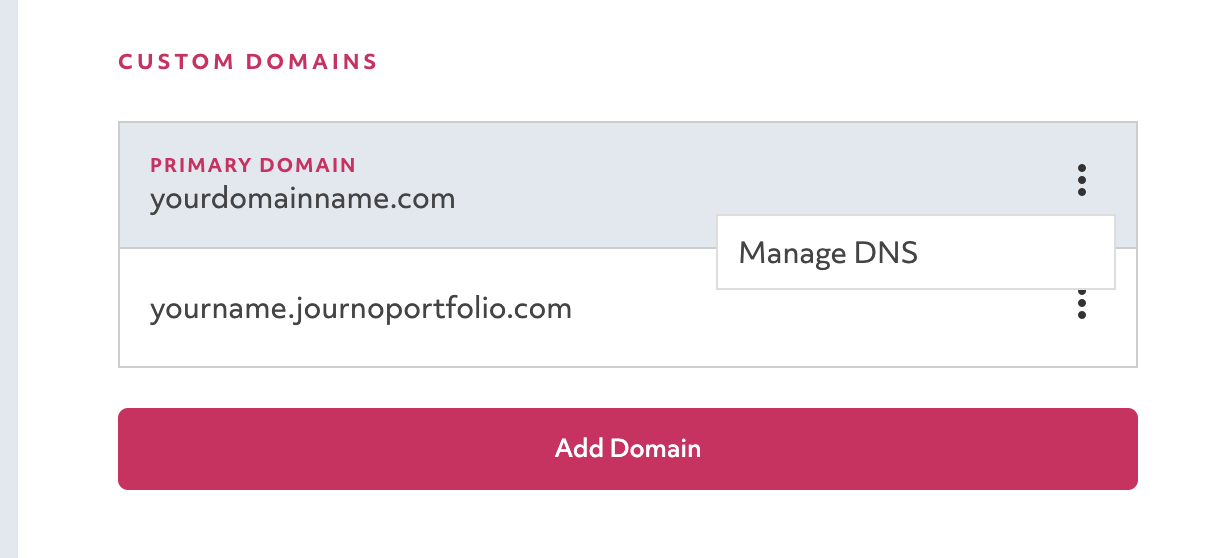
On your portfolio go to "Settings" _> "Domain":

Then click "Manage" on your domain name:
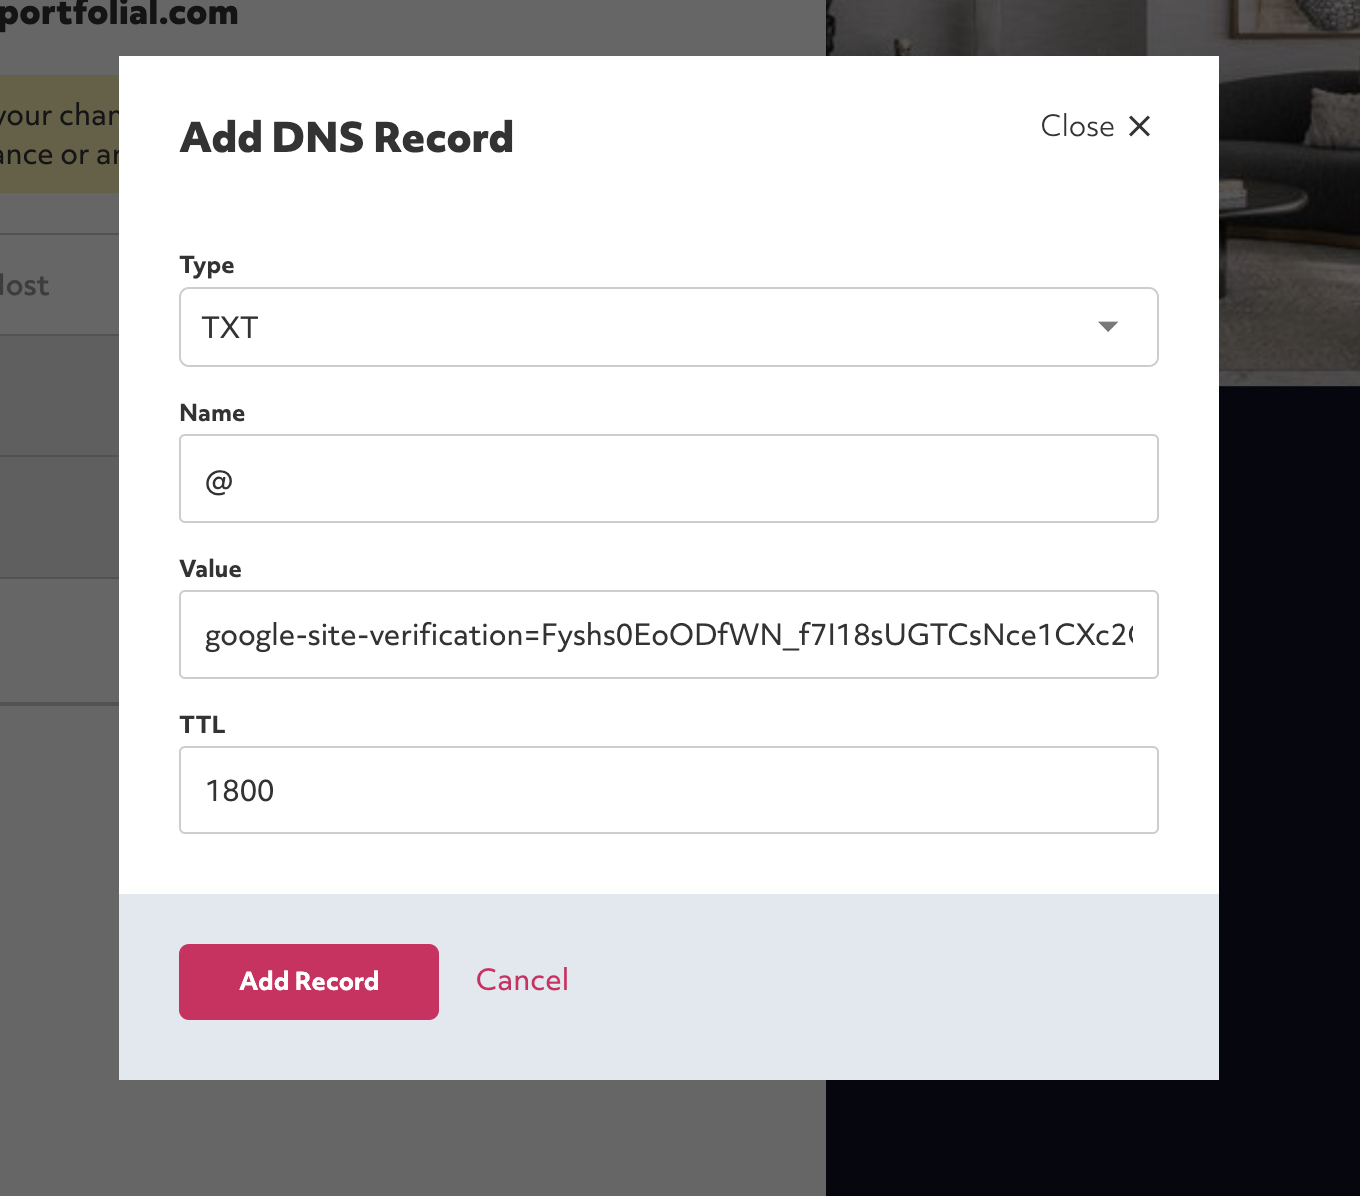
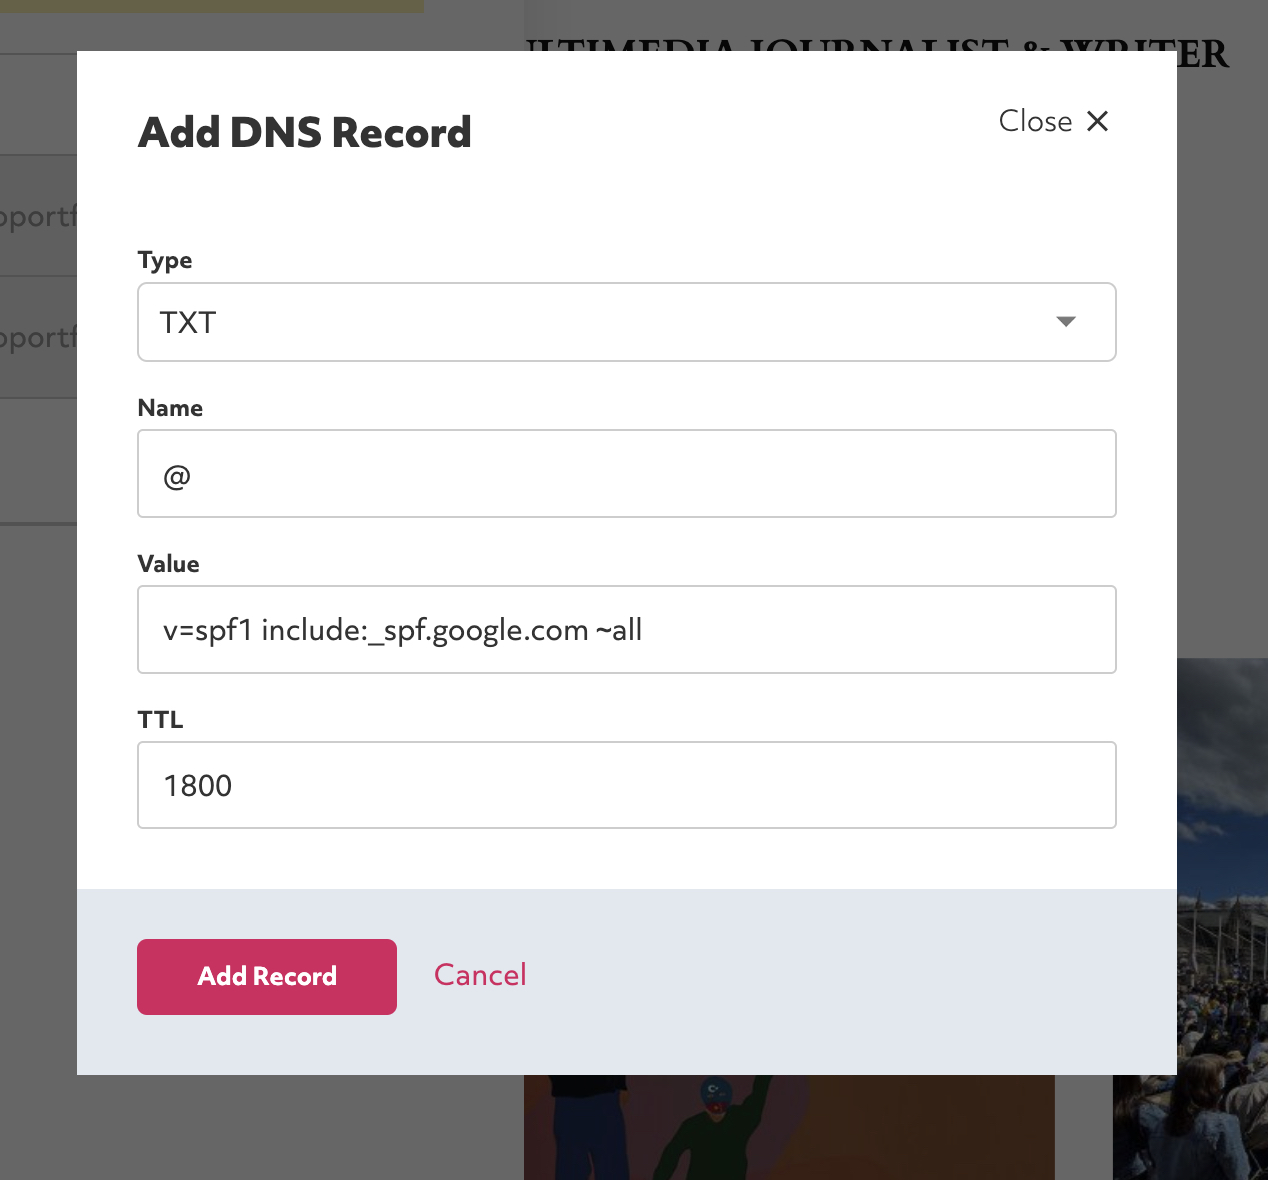
Click "Add Record" and add the "TXT" record like this:
In Google Workspace now click "Protect Domain" and it should verify the domain. It might take a few minutes before it detects the newly added record.
Now that you have verified the domain you can add the MX record that routes your emails to the right place. Back in Journo Portfolio click "Add Record" again and add this record.
Type: MX
Name: @
Value: smtp.google.com

An SPF record helps to verify your emails so they are less likely to be marked as spam. The record you should add is:
Type: TXT
Name: @
Value: v=spf1 include:_spf.google.com ~all
All set!
You may also optionally wish to add a DKIM record.
Please contact support if you need any help at all.
Still need help?